

News
Pad Printing Problems & Solutions: 21 Most Common Issues Fixed
1. What should I really focus on in pad printing?
2. How do I know if my plate is etched to the right depth?
3. What’s the real difference between screen printing and pad printing thinners?
4. Does the color of a silicone pad mean anything?
5. How can I print clearly on curved or rounded surfaces?
6. How do I know if my thinner is drying at the right speed?
7. Why do bubbles or tiny holes sometimes appear in my print?
8. Are all printing plates the same?
9. Why do my prints sometimes look blurry or spread out at the edges?
10. What causes fuzzy or rough edges on prints?
11. Why does my doctor blade sometimes drag ink back when it lifts?
12. Why is there a faint shadow or haze around my printed image?
13. Why won’t my ink stick sometimes?
14. Why am I seeing double or ghosted images?
15. What are these thin lines of ink that won’t scrape off my plate?
16. Why isn’t my doctor blade cleaning the plate fully?
17. Why does ink get scraped out from the middle of big solid areas?
18. Why do bubbles show up mainly around the edges of my print?
19. Why does my printed image look stretched or squashed?
20. How can I fix uneven color in my prints?
21. How do I stop colors from looking thin or see-through on dark backgrounds?

Let's talk about pad printing! Whether you're just starting out or have been in the field for a while, we all run into questions now and then. Below, you’ll find some of the most common challenges explained in a warm, down-to-earth way, along with clear steps you can take to solve them. Think of this as a friendly chat with someone who’s been there and wants to help.
Question 1: What should I really focus on in pad printing?
At its heart, pad printing is all about transfer — getting ink from a plate onto your product neatly and reliably. To do this well, four key players need to work together smoothly:
● The Plate is where it all begins. Its depth, hardness, and finish set the stage for how much ink you’ll lay down.
● The Silicone Pad is your go-between. Its softness, shape, and size help it hug curves and move ink faithfully.
● The Ink is your messenger. It needs to dry just right — not too fast, not too slow — and stick well once it’s in place.
● Your Workpiece is the final destination. Its texture, how it’s held, and what it’s made of really matter.
Your Workspace is the support system. A steady temperature, calm humidity, and a clean area keep everything running like clockwork.
Question 2: How do I know if my plate is etched to the right depth?
There’s no one-size-fits-all number here — it’s more like tuning an instrument. A good starting point is around 2.4µm, but you’ll adjust based on your design:
Fine details or text? Go shallower, around 2.0µm.
Solid blocks of color? Go deeper, 3.0µm or more, so the color looks rich and even.
Printing on a rough surface? Add a little extra depth so the ink has enough to hold onto.
On something smooth? You can go a bit shallower.
To check, you can measure with a depth gauge or simply learn to read the signs:
● If prints look smudged or colors bleed, the plate might be too deep.
● If you see tiny bubbles or gaps in the print, it might be too shallow.
● If ink seems to dry on the pad before it even touches your product, that’s another hint it’s too shallow.
Question 3: What’s the real difference between screen printing and pad printing thinners?
Great question! It mostly comes down to drying speed.
Pad printing thinner dries fast — usually in just 3–8 seconds. This keeps the ink from spreading or beading up on the pad as it moves.
Screen printing thinner dries slowly, staying workable for minutes so it doesn’t clog the mesh.
A handy tip: if you’re working in a really hot room and your pad printing thinner is drying too fast, you can sometimes use screen printing thinner just to slow things down a bit. It’s like switching from a sprint to a steady jog.
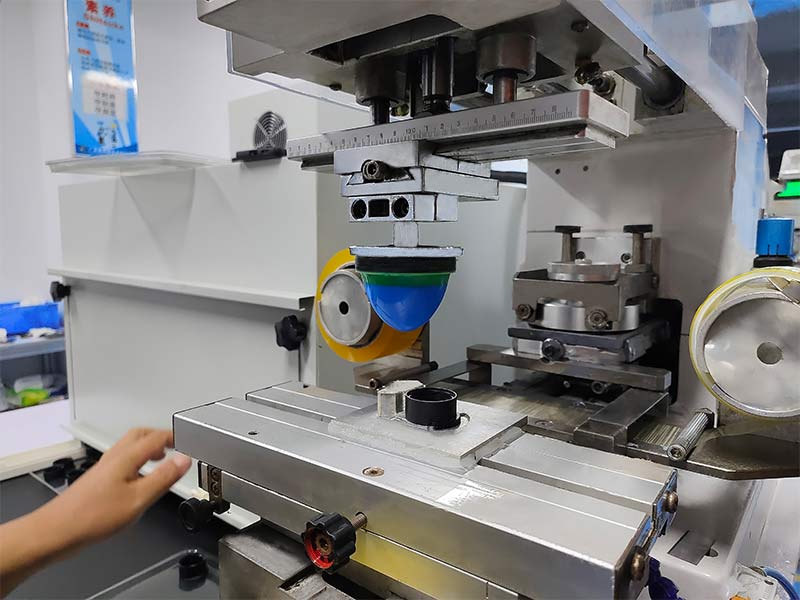
Question 4: Does the color of a silicone pad mean anything?
You might see pads in red, white, light yellow, or blue — but here’s the good news: the color itself doesn’t really affect how they work. It’s mostly about the pigments used when they’re made.
What truly matters is finding a pad with the right softness, shape, and size for your specific product. So don’t stress over the color — focus on how well it fits and performs.
Question 5: How can I print clearly on curved or rounded surfaces?
Printing on curves can be tricky, but it’s totally doable with a thoughtful approach:
● Pick the right pad — match its softness and curve to your product’s shape.
● Hold your workpiece steady with a snug, reliable fixture.
● Adjust your machine settings so the pad presses gently and evenly.
If you still notice stretching or distortion, don’t worry — sometimes the artwork can be slightly adjusted beforehand to “cancel out” the pad’s flex. It’s like planning ahead for a curve in the road.
Question 6: How do I know if my thinner is drying at the right speed?
Keep an eye on two moments:
● Right after the pad picks up ink — if it looks dry or tacky already, your thinner is drying too fast.
● After printing — if edges look frayed or cracked, it’s still too fast. If they look blurry or spread out, it’s too slow.
Trust what you see, and don’t be afraid to adjust your mix or try a different thinner grade. It’s all about finding that sweet spot.
Question 7: Why do bubbles or tiny holes sometimes appear in my print?
Bubbles usually mean something’s out of sync between your pad, plate, and ink:
● Your pad might be too flat, damaged, or not letting air escape well.
● Your plate could be too deep (holding too much ink) or too shallow (not holding enough).
● Your ink might be too thin, too thick, or drying unevenly.
● Your doctor blade could be worn or set at the wrong angle, leaving behind traces of ink that get in the way.
● Start by checking these areas one by one — you’ll often find the culprit pretty quickly.
Question 8: Are all printing plates the same?
Not at all! You have options depending on what you need:
● Traditional steel plates (around 10mm thick) are tough and great for long runs.
● Thin steel foils (like 0.25mm) are used in sealed cup systems — they’re thin and need a magnetic backing.
● Flexible plates (like nylon or resin) are cheaper and faster to make, perfect for testing or short runs, but they won’t last as long.
It’s about choosing what fits your job best: how many pieces, how fine the detail, and what machine you’re using.
Question 9: Why do my prints sometimes look blurry or spread out at the edges?
This often comes down to four common things:
● Ink too thin — thicken it up a bit.
● Pad not going deep enough into the plate — adjust the stroke.
● Pad too hard — try a softer one.
● Pad worn out — time for a fresh one.
● Try checking in that order — many times, it’s a quick fix.
Question 10: What causes fuzzy or rough edges on prints?
This one can have quite a few causes, but here are the usual suspects:
● Thinner drying too slowly
● Workspace too hot
● Plate too deeply etched
● Ink sitting out too long
● Worn doctor blade
● Pad angle off, surface dirty, or descending too fast
● Too much pressure or a pad past its prime
It might look like a long list, but take it step by step — start with your ink and thinner, then move to the pad and blade.
Question 11: Why does my doctor blade sometimes drag ink back when it lifts?
This can happen if:
● There’s too much ink on the plate
● The blade is nicked, dull, or not set right
● Air pressure is too low
● The blade holder is bent
Try reducing ink flow, checking the blade, and making sure pressure is around 5 ± 1 kg/cm². Often, a fresh blade or a straightened holder does the trick.
Question 12: Why is there a faint shadow or haze around my printed image?
This is almost always because the pad is pressing too hard onto the product. Ease up the pressure just a bit — think of it as a gentle kiss rather than a push. You’ll see the haze clear up and the edges sharpen.
Question 13: Why won’t my ink stick sometimes?
If your prints are failing adhesion tests, consider:
● The surface — some materials need pretreatment (like flame or corona) to “grab” ink better.
● The pad — new pads often have a release coating; give them a gentle clean before use.
● Pressure & depth — not enough pressure or too shallow a plate can mean too little ink is transferred.
● Ink itself — old ink or the wrong type for your material might be the issue.
● Curing — double-check that drying time and temperature match the ink’s needs.
Question 14: Why am I seeing double or ghosted images?
Ghosting usually means something’s moving when it shouldn’t:
● Machine parts may be loose
● Pad might not be secured tightly
● Pad isn’t lifting cleanly off the plate
● Your product is shifting in the fixture
● Pad could be too stiff
● Tighten, align, and possibly soften your pad — stability is key here.
Question 15: What are these thin lines of ink that won’t scrape off my plate?
Those stubborn lines often mean:
● The plate has a scratch or nick
● The plate edge is rough or burred
● The doctor blade is damaged
● For light scratches, very fine sandpaper (like 1000-grit) can help. For deeper damage, replacing the plate or blade might be the best move.
Question 16: Why isn’t my doctor blade cleaning the plate fully?
If wiping is generally poor (not just lines):
● The plate might not be level
● The blade may not be sitting flat
● The blade could be worn down
● Air pressure might be too low
● The blade holder could be warped
● Re-level, reseat, or replace as needed — and keep that pressure steady.
Question 17: Why does ink get scraped out from the middle of big solid areas?
This happens when:
● The blade is too soft and sags into wide ink cells
● The plate wasn’t made quite right for that design
● Your ink roller or brush is uneven
● Try a stiffer blade, check with your plate supplier, or replace your ink applicator if it’s worn.
Question 18: Why do bubbles show up mainly around the edges of my print?
Edge bubbles are often trapped air. Check:
● Pad shape — a slightly pointed pad can let air escape better
● Where the pad picks up ink — try moving it slightly off-center
● Pad condition — replace if damaged
● Blade pressure — too little can leave ink behind
● Pickup pressure — a little more can help the pad draw ink in fully
Question 19: Why does my printed image look stretched or squashed?
Distortion usually means the pad is deforming too much or unevenly:
● It’s descending too far
● It’s too hard or too pointy for the surface
● The machine or pad is misaligned
● Pressure is too high
● In multi-color prints, pads aren’t descending to the same height
Adjust height, pressure, alignment, or try a different pad shape — small tweaks can make a big difference.
Question 20: How can I fix uneven color in my prints?
If color looks patchy or inconsistent:
● Stir your ink thoroughly — pigments can settle
● Slow down your print cycle to let ink flow evenly in the plate
● Keep your pad clean and free of dried ink or flow marks
● Consistency in process often brings consistency in color.
Question 21: How do I stop colors from looking thin or see-through on dark backgrounds?
When solid colors look weak or translucent:
● You might be adding too much thinner — try replenishing with fresh, unthinned ink
● Your plate may be too shallow — a little more depth can lay down more ink
The ink itself may not be opaque enough — your supplier can often provide a stronger, higher-coverage version
We hope this guide feels like a helpful companion in your pad printing journey. Remember, every challenge has a solution — often it’s just about looking at one thing at a time. Happy printing