

News
Inkcup Pad Printing Machine vs. Inkwell: Which One Saves More?
In the world of surface printing, pad printing has become the go-to process for industries like electronics, toys, medical devices, and auto parts—mainly because it can print clean, sharp images on surfaces that aren't flat or even. When it comes to the two main ink delivery systems, the inkcup pad printing machine (sealed ink cup type) is steadily taking over from the traditional inkwell pad printing machine (open tray type).
What's the real difference between an inkcup and an inkwell system? How do you pick the right cup size and material? And what's the deal with dual-cup setups? This article runs through all of that—from the basics to the more advanced dual-cup technology—so you can make a choice that actually makes sense for your shop.
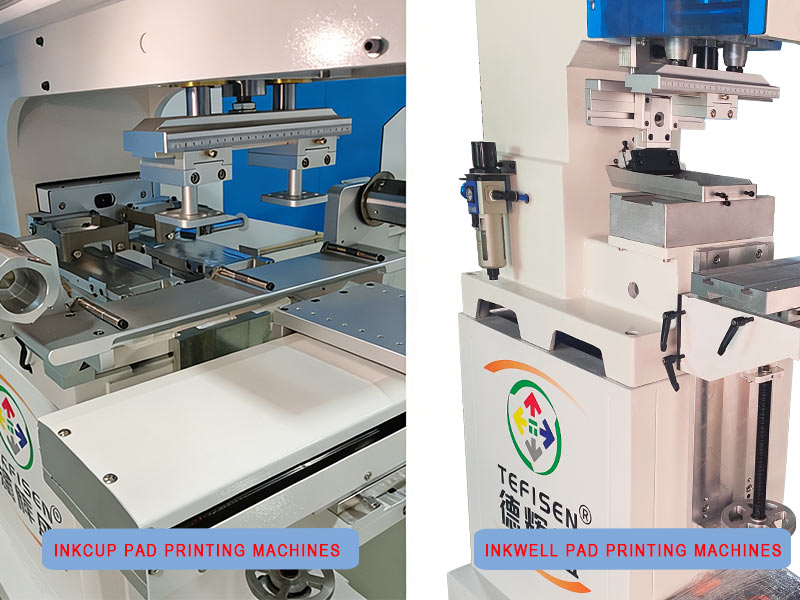
I. Inkcup Pad Printing Machines vs. Inkwell: What Sets Them Apart?
1. How Each System Works
Inkcup Pad Printing Machine (Sealed Type) : As the cup slides forward, it delivers ink to the etched plate, filling the engraving. When it slides back, the sharp edge of the ceramic or tungsten carbide ring at the bottom of the cup acts like a built-in doctor blade, scraping off everything except the ink sitting in the etched grooves.
Inkwell Pad Printing Machine (Open Tray) : As the pad moves forward, a stirrer bar pushes ink into the etched areas of the steel plate. When the pad moves back, a doctor blade scrapes off the excess ink, leaving ink only in the engraved pattern.
2. Head-to-Head Comparison
This is where the inkcup really shines. Because the ink is sealed inside the cup, solvent evaporation drops by over 86% compared to an open tray. That means noticeably cleaner air in the workshop and a much easier time passing things like ISO14001. Open trays, on the other hand, let solvents evaporate freely—something that's becoming harder to ignore from both a regulatory and health standpoint.
With an inkcup pad printing machine, you use about 25% less ink, and thinner consumption drops too. Since the ink isn't sitting out in the open, you're not constantly losing material to evaporation. Once you've dialed in the ink viscosity on an inkcup machine, it'll hold steady for 6 to 8 hours without needing adjustments. With an open tray, the thinner keeps evaporating, the ink keeps thickening, and someone has to keep adding thinner throughout the shift just to keep the print quality from drifting.
|
Aspect |
Inkcup Pad Printing Machine |
Inkwell Pad Printing Machine |
|
Environmental friendliness |
⭐⭐⭐⭐⭐ VOC down 86% |
⭐⭐ Open evaporation |
|
Ink efficiency |
⭐⭐⭐⭐⭐ 25% savings |
⭐⭐ High waste |
|
Print consistency |
⭐⭐⭐⭐⭐ Stable 6–8 hrs |
⭐⭐⭐ Needs constant
tweaking |
|
Initial equipment cost |
⭐⭐ Higher |
⭐⭐⭐⭐ Lower |
|
Long-term operating cost |
⭐⭐⭐⭐⭐ Lower |
⭐⭐ Higher |
|
Best suited for |
Electronics, medical, cosmetics, automotive |
General goods, low-end plastics, prototyping |
|
Verdict |
⭐⭐⭐⭐⭐ The better long-term
choice |
⭐⭐ Being phased out |
II. Ink Cup Specs: Size and Material Matter
1. Choosing the Right Cup Size
Cup size is determined by diameter, and each size handles a certain printing area:
|
Cup Diameter |
Max Print Area |
Typical Applications |
|
φ75mm |
60×60mm |
Tiny electronic parts, precision components |
|
φ90mm |
75×75mm |
Phone buttons, bottle caps, small toys (most
common) |
|
φ120mm |
100×100mm |
Mid-size electronics, cosmetic cases |
|
φ150mm |
130×130mm |
Larger flat surfaces |
|
φ195mm |
170×170mm |
Big graphics, multi-pattern layouts |
Quick tip: For most small to medium parts, stick with φ90mm. Go φ60mm for really tiny precision work, and step up to φ120mm or larger when the print area gets bigger.
2. Cup Body and Ring Materials
The quality of the cup itself—both the body and the doctor ring—has a direct impact on print quality and how long the parts last.
 |
 |
| Single-cup | Dual-cup |
|
Material |
Pros |
Cons |
Best Used For |
|
Aluminum cup body |
No ink contamination, durable, looks solid |
More expensive |
High-end machines, high-volume production |
|
POM plastic cup body |
Cheap, lightweight |
Wears faster |
Budget machines, occasional use |
|
Ceramic ring |
Hard, wear-resistant, good value |
Can chip if hit hard |
Everyday printing, most applications |
|
Tungsten carbide ring |
Extremely durable (millions of cycles), handles
special inks like silver paste |
Pricey |
High-volume runs, abrasive or specialty inks |
Quick tip: For regular production, a ceramic ring is a safe bet. If you’re running high volumes or using tough inks like silver paste, spring for tungsten carbide with an aluminum cup body.
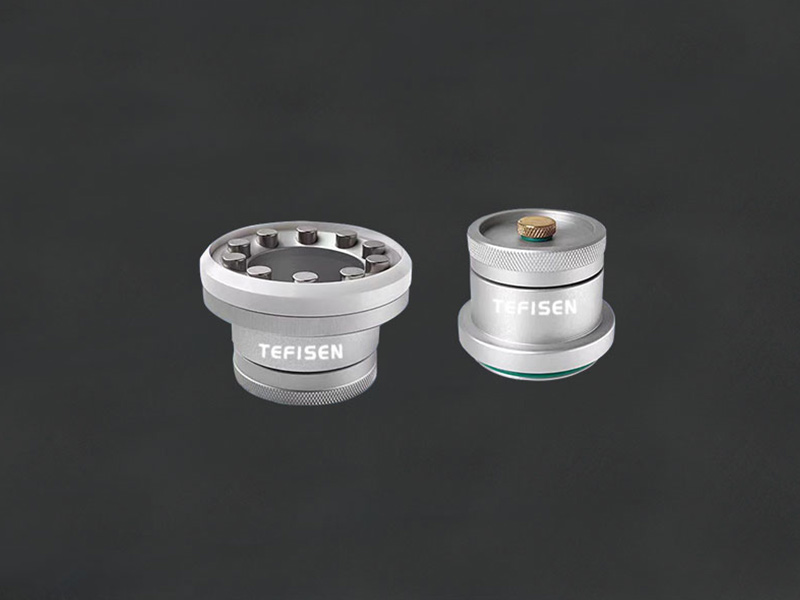
3. Beyond Single-Cup: Dual-Cup Options
There’s more to ink cups than just single-cup setups—dual-cup configurations are worth looking at if you’re printing two colors.
III. Integrated Dual-Cup vs. Independent Dual Ink Cup
As two-color printing has become more common, two different approaches have emerged: the integrated dual-cup and systems with two independent ink cups.
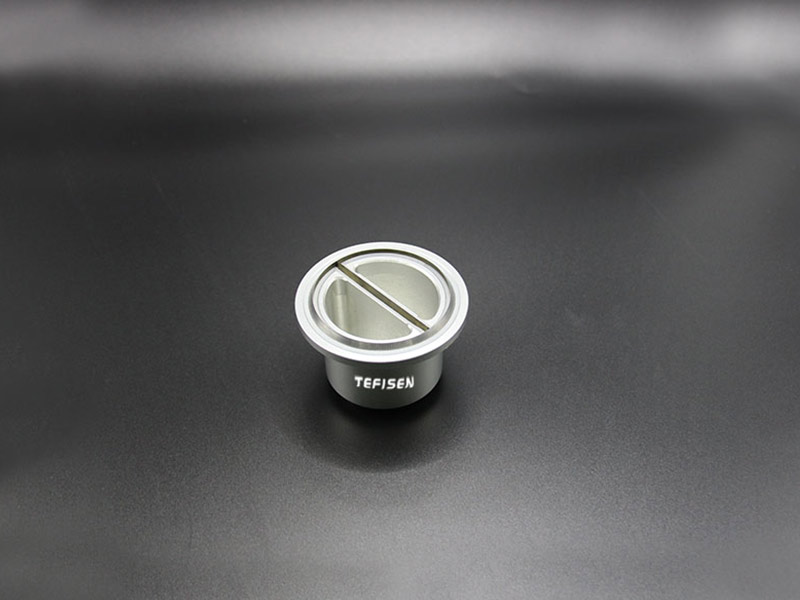
1. What’s an Integrated Dual-Cup?
Think of it as one cup body with two separate ink compartments, each holding a different color, but sharing a single doctor ring. The idea is simple: get two-color printing done on a machine that costs about the same as a single-color unit.
2. Independent Dual Ink Cup Systems
These come in a couple of common configurations:
• Two-color shuttle type: The shuttle moves back and forth between two cups. Typical speed is 800–1200 pieces per hour, with registration accuracy under 0.05mm.
• Two-color rotary type: A multi-station turntable cycles parts under two separate cups. Speed can hit over 1000 pieces per hour, making it a good fit for larger batches.
3. How They Compare
|
Aspect |
Integrated Dual-Cup |
Independent Dual Ink Cup |
|
Design |
One cup body, two ink chambers, shared doctor ring |
Two completely separate cups, two doctor systems |
|
Registration accuracy |
⭐⭐⭐ Moderate (fixed
spacing) |
⭐⭐⭐⭐⭐ High (<0.05mm) |
|
Print area flexibility |
⭐⭐ Limited |
⭐⭐⭐⭐ Larger |
|
Color spacing adjustment |
⭐ Fixed |
⭐⭐⭐⭐⭐ Fully adjustable |
|
Output |
⭐⭐⭐ Around 800 pcs/hr |
⭐⭐⭐⭐ 800–1500 pcs/hr |
|
Equipment cost |
⭐⭐⭐⭐ Lower |
⭐⭐ Higher (2–3×) |
|
Ink savings |
⭐⭐⭐⭐⭐ 25%+ |
⭐⭐⭐⭐⭐ Same |
|
VOC reduction |
⭐⭐⭐⭐⭐ 86% |
⭐⭐⭐⭐⭐ Same |
|
Maintenance complexity |
⭐⭐⭐⭐ Simple |
⭐⭐ More involved |
|
Footprint |
⭐⭐⭐⭐ Compact |
⭐⭐ Larger |
|
Best for |
Small to medium batches |
Medium to large batches |
4. Which One Should You Go With?
Go integrated dual-cup if:
• You’re working with a tight budget but still need two-color capability
• Your product lineup is pretty stable, and the two-color layout doesn’t change much
• Floor space is limited
• You don’t need ultra-precise registration (think toys, general merchandise)
Go independent dual ink cup if:
• You need tight registration (under 0.05mm), like in electronics or medical parts
• You switch between different products with varying color spacing
• You’re running high volumes and need 1200–1500 pieces per hour
• You have the budget for a higher-end setup and care about long-term efficiency
IV. Common Problems and How to Fix Them
|
Problem |
What’s Usually Wrong |
How to Fix It |
|
Ink coming back up, image looks blurry |
Plate etched too deep |
Re-make the plate, keep depth around 2.4 microns |
|
Pinholes or bubbles in the print |
Plate etched too shallow |
Increase etch time or depth |
|
Ink looks uneven on the pad (“orange peel”) |
Plate too deep or ink too thin |
Check plate depth, adjust ink viscosity |
|
Ink strings or spider webs |
Ink too thick |
Add thinner until viscosity is right |
|
Image incomplete or faint |
Pad shape or hardness wrong |
Switch to a round or cone-shaped pad with medium
hardness |
|
Ink drying too fast on the plate |
Thinner evaporates too quickly |
Add slow-drying agent or switch to a slower thinner |
|
Colors not lining up |
Registration off |
Check shuttle or turntable accuracy, recalibrate
work table |
|
Ink leaking from the cup |
Ceramic ring worn out |
Replace the ring (ceramic or tungsten carbide) |
Wrapping Up
If you look at the big picture, the inkcup pad printing machine has become the go-to choice for good reason. You get 86% less solvent evaporation, about 25% less ink usage, and stable print quality that doesn’t require constant babysitting. When you’re picking out a machine, just match the configuration to what you actually run—single color, integrated dual-cup for simpler two-color jobs, or independent dual ink cups when precision and flexibility matter most.
Hope this helps you make a clearer decision. If you’ve got questions about your specific application, feel free to reach out.